REVIEW · EVENING EXPERIENCES
Magical ”Stockholm by Night” Photo Walk
Book on GetYourGuide →Operated by JP Photo · Bookable on GetYourGuide
Blue hour turns Stockholm into a light show. This private Stockholm by Night Photo Walk helps you go beyond postcard shots, using Stockholm’s glowing waterfront and windows to learn real night photography skills. I especially like the individual guidance (so you’re not stuck copying someone else) and the focus on long exposure, movement, and light painting. The only real drawback: it’s just 2 hours, so you’ll leave with skills and great images, not a full mastery course.
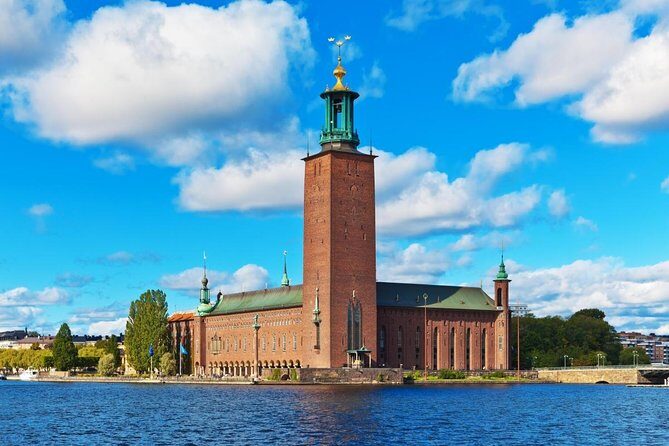
You start at Slussen, right by Stockholm’s city museum (Stadsmuseet), and end in Old Town. You’ll practice when the city shifts from dim to dreamy, and you’ll get practical direction without needing advanced technical knowledge. Bring comfortable shoes and your own camera or phone, and expect a relaxed pace built around your interests and experience.
In This Review
- Key things to love about this Blue Hour photo walk
- Why Stockholm by Night starts at Blue Hour
- Slussen to Old Town: how the walk actually feels
- The night skills you practice during the 2 hours
- Sharp images even when it’s dark
- Long exposure for drama and light
- Painting with light
- Movement as a storytelling tool
- Depth, mood, and composition
- Long exposure and light painting: the practical part
- What you’re really learning
- Why “painting with light” is such a good teaching tool
- A key gear note: tripod reality
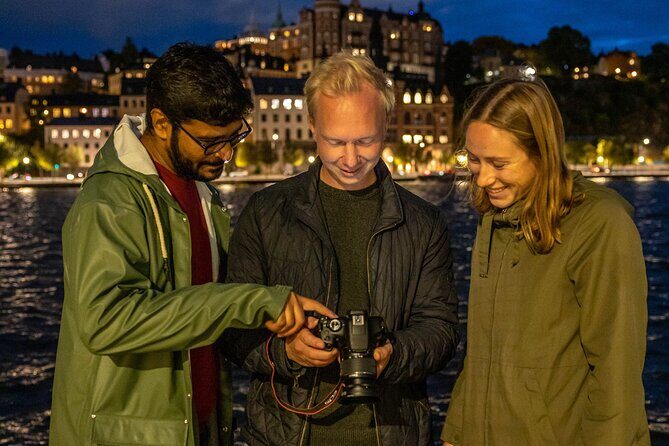
- The value of “private” in a photo walk
- Gear and prep: what to bring (and what not to overthink)
- What to bring
- What’s included
- Tripod: recommended, not required
- Price: is $155 per person worth it?
- Who should book this Stockholm by Night photo walk?
- After the walk: what you’ll take home
- Should you book Stockholm by Night?
- FAQ
- How long is the Stockholm by Night Photo Walk?
- Where do we meet for the tour?
- Where does the tour end?
- Is this a private experience?
- What languages is the guide available in?
- What’s included in the price?
- Do I need advanced photography knowledge?
- Do I need to bring a camera or phone?
- Is a tripod provided?
- What do I receive after the tour?
Key things to love about this Blue Hour photo walk
- Blue Hour timing: you shoot when daylight fades and city lights begin to glow
- Private, tailored route: the photographer adjusts the plan to your level and what you want to photograph
- Light painting + long exposure: you learn how to use low light creatively instead of fighting it
- Storytelling through photos: you’ll work on mood, depth, and drama, not just “pretty views”
- Hands-on support: headlamps are included, plus ongoing guidance while you shoot
Why Stockholm by Night starts at Blue Hour
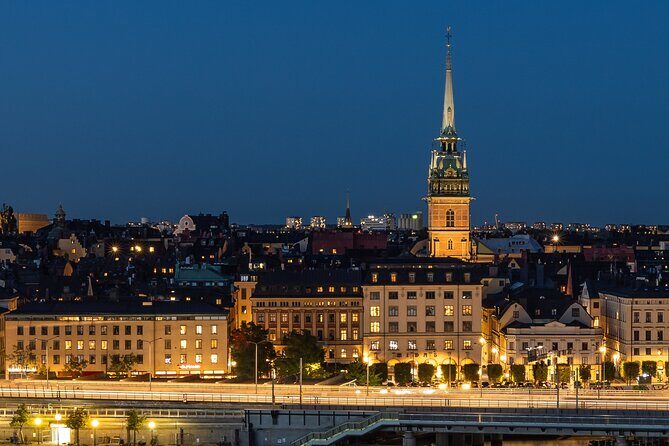
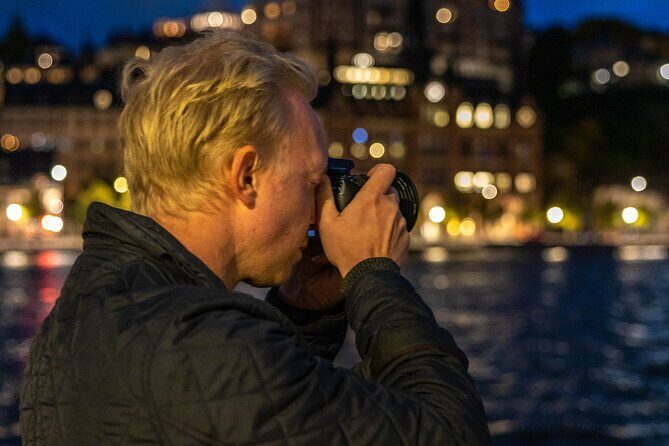
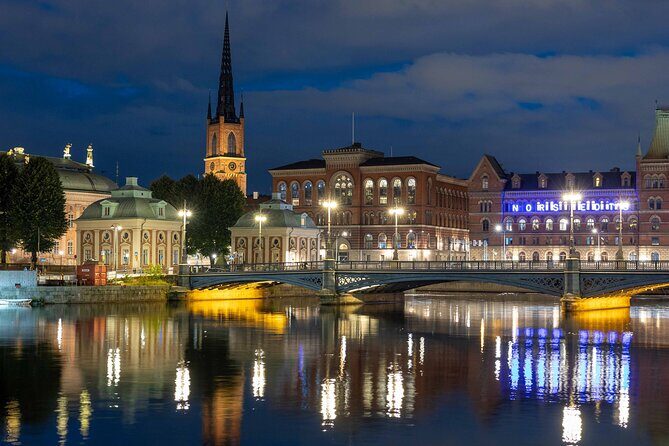
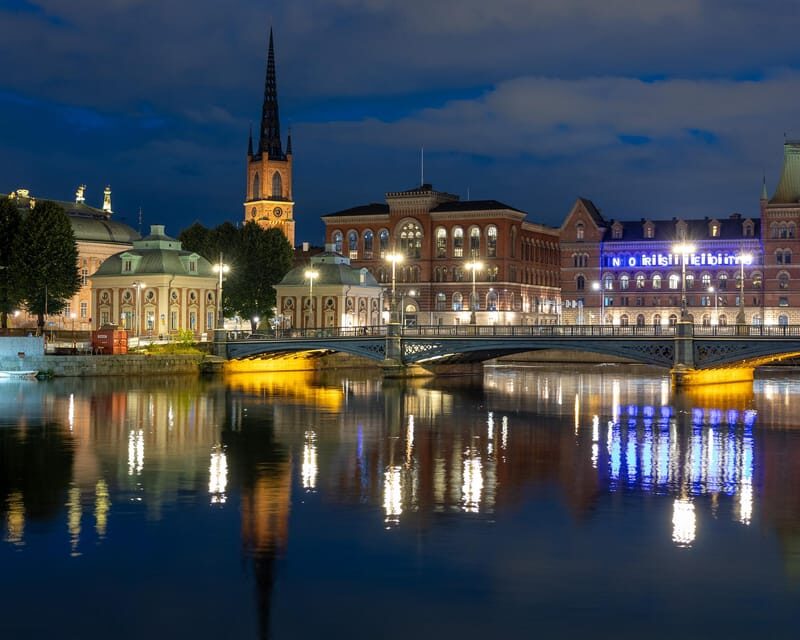
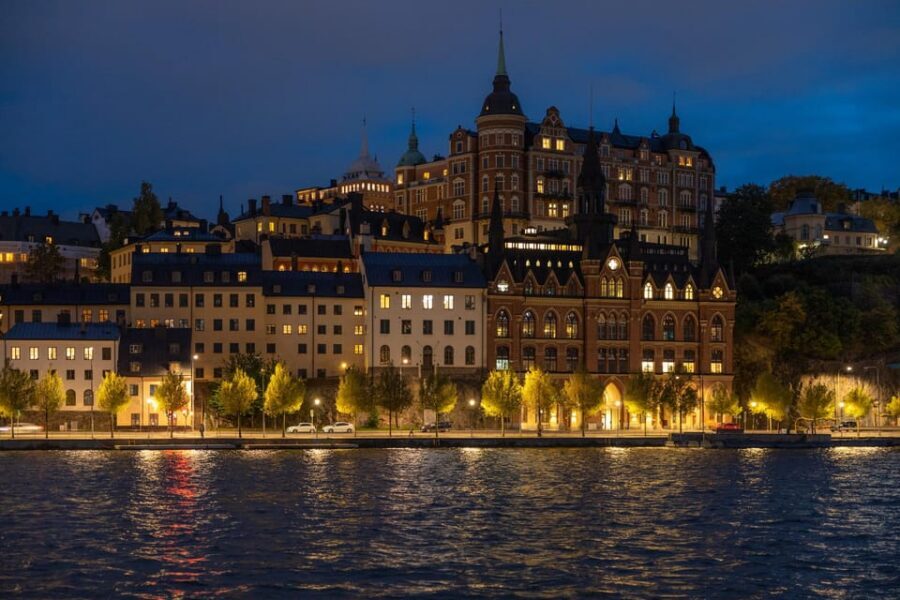
If you’ve ever tried nighttime photos and ended up with either blurry darkness or overexposed lights, this walk starts in the sweet spot. Blue Hour is that short window when daylight is almost gone, but the sky still holds color. In Stockholm, that means reflections begin to appear on the water, windows start glowing, and the whole city softens into layered light.
What I like about starting here is how it teaches a smarter approach. Instead of waiting until the night is fully black, you learn to use the gradual transition to shape your photos. You’ll get a feel for exposure and contrast changes as the scene evolves, which is exactly what makes night photography click in the real world.
This is also where you’ll see Stockholm at its most photogenic for real: not just landmarks, but the rhythm of streetlights, water lines, and the glow of buildings. The city becomes a set of visual tools you can reuse later, even when you’re traveling on your own.
Other photography tours and photo walks in Stockholm


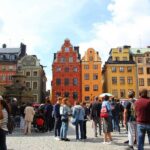
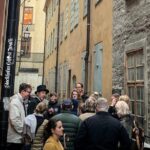
Slussen to Old Town: how the walk actually feels
You meet at Slussen, right in front of Stadsmuseet. From there, the experience is designed as a relaxed evening stroll with photography stops, ending in Old Town. It’s a “walk-and-shoot” format, not a lecture in one spot, so you’re constantly testing ideas as you move.
That flow matters. Night photos can be tricky because every minute changes the lighting. As you transition from the first moments of Blue Hour into fuller night, you’ll learn how to keep your images sharp while still capturing atmosphere. You’re also guided to scenic viewpoints and quieter corners, which helps you avoid ending up with only the obvious views.
One thing I’d watch for: the exact route is tailored to your experience level and interests. That’s a plus for customization, but it also means you should be open-minded. If you’re the type who wants a strict checklist of famous spots, this might feel more flexible than you expected.
The night skills you practice during the 2 hours
This walk isn’t just about showing you where to stand. The focus is on learning the choices behind strong night photos—so you can repeat the results later.
Here are the core skills you’ll work on during the evening:
Sharp images even when it’s dark
Low light makes everything harder: your camera needs more time to gather light, and tiny movements can turn “sharp” into “oops.” You’ll get guidance aimed at capturing clear, stable images in nighttime conditions, not just dramatic blur.
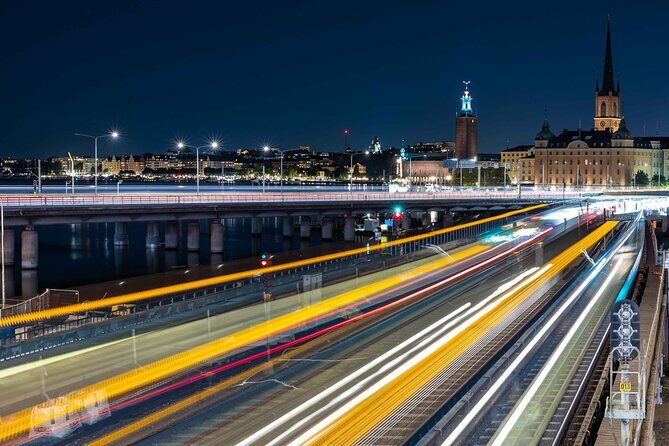
Long exposure for drama and light
You’ll learn how to use long exposures creatively. That includes using the city’s lights as a design element rather than letting them blow out or smear. The goal is control: making the exposure help your composition and mood.
Other walking tours we've reviewed in Stockholm


Painting with light
The walk explicitly teaches how to paint with light—an approach that turns moving light sources into visible trails or intentional highlights. It’s one of the fastest ways to make a night photo look “crafted,” even if you don’t know a lot of technical terms yet.
Movement as a storytelling tool
Movement can be a problem in night photography, or it can be your story. You’ll be guided on how to use moving elements to add energy and depth, instead of fighting motion blur every time.
Depth, mood, and composition
“Pretty” is easy; “engaging” takes choices. You’ll work on creating photos with depth and drama, which often means layering foreground and background and using the glow of the city to lead the eye.
Even if you don’t feel confident with manual settings, the walk is built for curiosity. You’ll still be the one pressing the shutter, but you’re not doing it alone.
Long exposure and light painting: the practical part
Long exposure can feel intimidating until someone breaks the problem into manageable steps. This experience is structured to help you understand what changes when exposure time increases—how city lights behave, how reflections turn into smooth streaks, and how movement becomes a design element.
What you’re really learning
You’re learning to “steer” the camera instead of guessing. When you understand how longer exposures affect brightness and light trails, you can make intentional trade-offs. That turns night photography from frustration into experimentation.
Why “painting with light” is such a good teaching tool
Light painting forces you to think in motion. Instead of waiting for the scene to do something for you, you create something. Even if your first attempt isn’t perfect, you’ll quickly see how small changes create big differences—exactly the kind of feedback loop that makes a short photo walk worth the money.
A key gear note: tripod reality
A tripod is recommended (and it’s not included). If you don’t have one, ask yourself one honest question: do you already have a stable way to hold your phone or camera for longer exposures? The guide includes headlamps, which helps with safety and setup in low light, but it doesn’t replace the stability advantage of a tripod.
If you want maximum results, consider bringing a small tripod if you own one. If you don’t, the walk can still teach you the concepts, but your final images may have more variation.
The value of “private” in a photo walk
Private sounds nice, but here it actually matters. The experience is built around a tailor-made route adapted to your level and interests. That means you’re not forced into one style of shooting or one set of stops.
I like this approach because night photography rewards personal pacing. Some people want to spend more time on long exposures. Others focus on reflections, skyline mood, or composition. A private guide can adjust how quickly you move, how you practice, and what you repeat until it clicks.
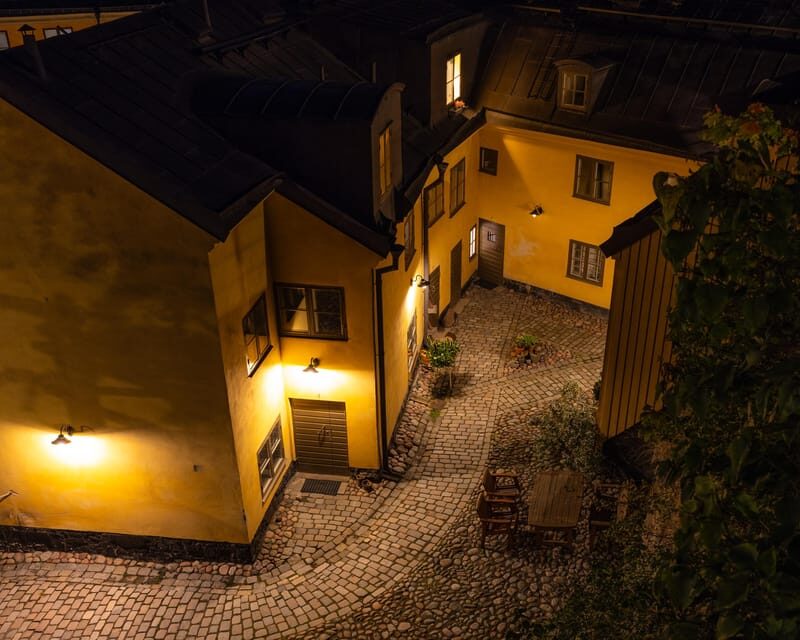
It’s also less stressful for solo photographers. One of the nice themes from past feedback is how the guide helps people find hidden photo spots across the city while still adapting to the photographer’s skill level. That combo—discovery plus coaching—is what turns a photo walk into something you’ll actually use again.
Gear and prep: what to bring (and what not to overthink)
The basics are simple, and the walk is friendly to beginners.
What to bring
- Comfortable shoes (you’ll be on foot during the evening)
- Your camera or phone
- A charged smartphone (for reference and staying practical)
What’s included
- Headlamps (helpful for low-light walking and setup)
- Individual guidance by a professional photographer and guide
- A private experience and a route adapted to you
- Local insight into Stockholm and Swedish culture
- An eBook about city photography after the tour
Tripod: recommended, not required
Tripod is recommended, and that’s a strong hint about how long exposure is handled. If you’re serious about crisp night results, plan to use one if you can. If you can’t, bring your best stable setup and expect the guide to guide you through workable options.
One more practical tip: charge everything before you leave your hotel. Night shooting eats battery faster than you expect.
Price: is $155 per person worth it?
At $155 per person for a 2-hour private walk, you’re paying for three things: expert direction, a route that’s adapted to you, and the time spent teaching practical night skills.
If you did this on your own, you’d probably get some great views—Stockholm is built for photos. But you’d also spend a lot of time trial-and-error on exposure, sharpness, and long exposure behavior. The value here is compressing that learning curve into a short, guided evening.
You’re also getting more than “stand here and shoot.” The guide is there to help you interpret what you’re seeing and to turn low-light challenges into creative opportunities. Add in the included headlamps and the post-tour eBook, and the price starts to make sense as a learning investment, not just a scenic stroll.
Where it may feel less worth it is if you already shoot night photos confidently and only want a location hunt. In that case, you might prefer a self-guided plan. But if you want feedback while you’re shooting, $155 for 2 hours of private coaching can be a solid deal.
Who should book this Stockholm by Night photo walk?
This walk is a good fit if you want night photography help with a human guide and you don’t want to spend your trip stuck wrestling with settings.
It’s especially suited for:
- Beginners or intermediate photographers who want clear instruction for Blue Hour and nighttime shooting
- Solo photographers who want a relaxed, personal pace
- People who care about mood, storytelling, and composition, not just skyline photos
- Anyone who wants long exposure and light painting taught in an approachable way
If you’re only interested in quick landmark shots and you dislike walking with stops, you might find the focus too photography-centric for your tastes. Also, because it’s 2 hours, you should treat it as an evening skills session, not a full evening tour of Stockholm.
After the walk: what you’ll take home
Even after you head to Old Town, the learning doesn’t have to stop.
You’ll receive a link to a guide called Skyline Stories with tips for composing stunning city photos. On top of that, you’ll get an eBook about city photography after the tour. That matters because night photography isn’t only about what you captured that evening—it’s about learning how to recreate the results when you’re back home or traveling elsewhere.
The goal is that you go home with photos you feel proud of, plus skills you can use on your next night shoot.
Should you book Stockholm by Night?
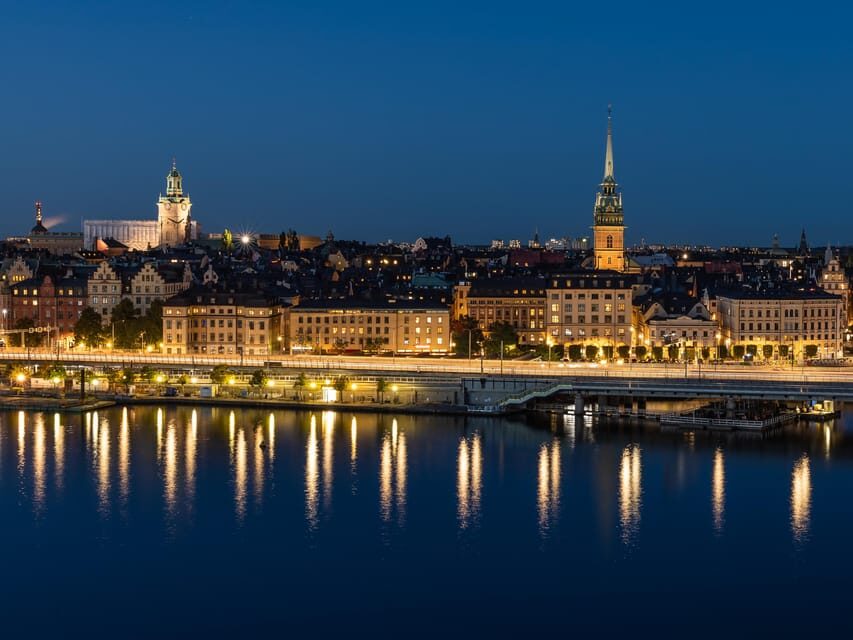
Book it if you want a guided night photography experience that’s practical, relaxed, and tailored to your level. You’ll start at Slussen near Stadsmuseet, shoot during Blue Hour, practice long exposure and painting with light, and finish in Old Town with both images and take-home guidance.
Skip it if you already know your night settings well, you don’t care about long exposure experimentation, or you’d rather spend your time doing a longer sightseeing itinerary.
If you’re on the fence, think about what you want most from this trip evening: views, or learning. This walk leans heavily toward learning, and that’s exactly why it works.
FAQ
How long is the Stockholm by Night Photo Walk?
It lasts 2 hours.
Where do we meet for the tour?
You meet right in front of Stockholm’s city museum (Stadsmuseet) at the subway station Slussen.
Where does the tour end?
The tour ends in Old Town.
Is this a private experience?
Yes, it’s a private group experience.
What languages is the guide available in?
The live guide speaks English and German.
What’s included in the price?
Included are individual guidance by a professional photographer and guide, a private experience with a tailor-made route, local insight into Stockholm and Swedish culture, headlamps, and an eBook about city photography after the tour.
Do I need advanced photography knowledge?
No. You don’t need advanced technical knowledge, just curiosity, a camera or phone, and a willingness to explore.
Do I need to bring a camera or phone?
Yes. A camera or phone is not included, so bring your own.
Is a tripod provided?
No. A tripod isn’t included, but it is recommended.
What do I receive after the tour?
After the tour, you’ll receive a link to the guide called Skyline Stories, along with the included eBook about city photography.